Download: naraeon.net/en/latest-naraeon-ssd-tools/
Secure Erase for SATA SSD
Press ‘X’ sign next to the ‘Serial Number : ‘. The serial number is needed for double-check. So you need to take a note of the Serial Number.
After that, click ‘Erase’ button.
Select flash drive to use(Back up data in the flash drive before start).
And check data erasure agreement checkbox. Finally, press start button.

Boot with flash drive. Then it will boot to the Nareon secure erase environment.
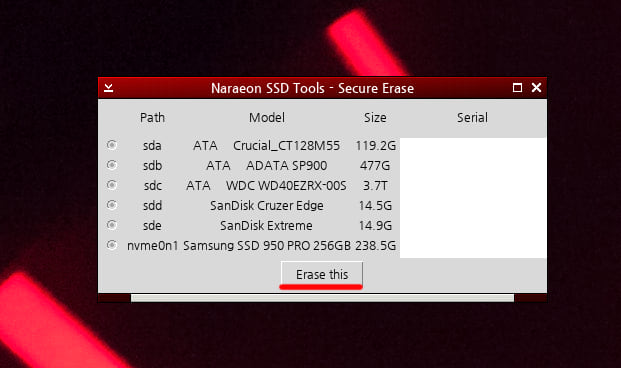
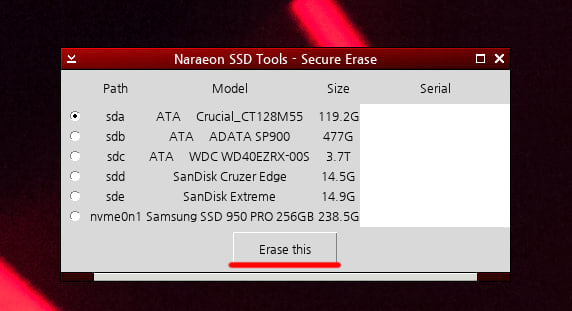
Firstly, you can see serial number and model name of the drive. Select one that equals to yours and click ‘Erase this’.

You can also get notification about going into sleep to unlock drive. You would know you got this by the dialog doesn’t show your model and serial, and it only have one button. Then go into sleep mode and you can get out from that mode by pressing a keyboard button or pushing power button.
Right-click on background and click ‘Secure Erase’ button.
Go through the process all over again.

Then it will request you to double-check the model name and serial number. SECURE ERASE CANNOT BE CANCELED AFTER THIS WINDOW. Double-check even though you think you selected the right one. If not, click cancel. And restart the process by right-click on background and click ‘Secure Erase’.

Finally after double-check screen, you would get the drive cleaned.
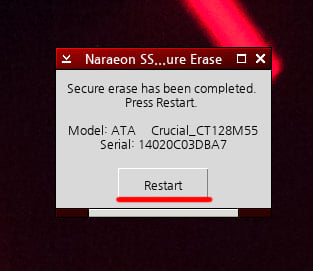
After erasure, it would show the completion screen. If you press ‘Restart’, it would restart. That’s it.
When window closing unexpectedly after selecting SSD
Right-click on background and select ‘xterm’
Find PSID from the SSD(Click here and see below section Where can you find the PSID code for your SSD?), after finding, input next command and press enter.
sedutil-cli –yesIreallywanttoERASEALLmydatausingthePSID (Found PSID) /dev/(Path provided at Secure Erase window: sda, sdb, etc…)
